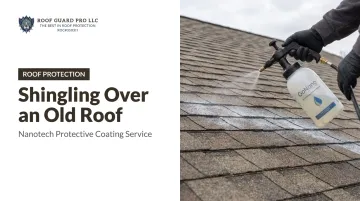
Get it wrong, and you're not saving money. You're hiding a problem under a new surface.
Many homeowners struggle with a basic question: is my roof even a candidate for this? The answer depends on layer count, deck condition, and manufacturer rules that vary by shingle type. This isn't a DIY project. A licensed roofing contractor needs to verify code compliance, check structural load, and confirm manufacturer compatibility before a single shingle goes down.
Done on the wrong roof, an overlay can trigger hidden deck rot, visible bumps (called telegraphing), leaks, voided warranties, and a shorter lifespan than you paid for.
This guide walks through the full process correctly — and introduces a lower-risk alternative worth considering first.
Key Takeaways
- Overlay requires a single, flat, structurally sound layer — most codes allow only two total layers
- Skipping tear-off cuts upfront cost but often shortens roof lifespan and can void manufacturer coverage
- Proper prep (flattening, new flashing, correct fasteners) prevents most overlay failures
- Post-installation checks catch problems before they turn into costly repairs
- Poor overlay candidates may still qualify for GoNano Shingle Saver — no added layer, no code issues
Before You Begin: Prerequisites and Building Code Considerations
Never start installation until you've confirmed eligibility. Here's what "ready for an overlay" actually looks like.
Assessing Roof and Code Eligibility
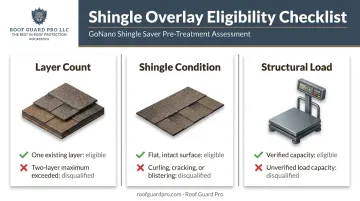
Three checks come before any tool touches the roof:
- Layer count — The 2018 IRC bars a recover when two or more roof-covering applications already exist, so one existing layer is your baseline for adding another.
- Shingle condition — The layer must lie flat, with no curling, cracking, or blistering. Confirm with the manufacturer before overlaying laminated or architectural shingles.
- Structural load — An added layer increases dead weight, which matters most in heavy snow-load regions. Have a contractor verify capacity before installation begins.
Non-Negotiables: When Overlay Should Not Proceed
Some conditions rule out overlay entirely. If you see any of these, plan for a full tear-off instead:
- Deck rot or sagging ridgelines
- Active leaks anywhere on the roof
- Gaps wider than ¼ inch between deck boards
- A roof that already carries two shingle layers
- Extensive flashing damage that needs full replacement
If your roof clears these checks, gather the right materials: fasteners long enough to penetrate both shingle layers into the deck, matching starter and cap shingles, and new flashing or drip edge components. Skimping here is how overlays fail early.
How to Shingle Over an Old Roof: Step-by-Step Process
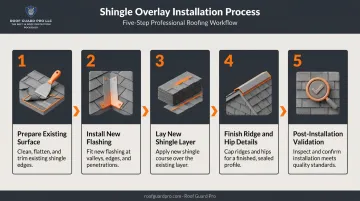
Overlay follows a defined sequence. Skipping steps, especially surface prep, is the single biggest cause of telegraphing and premature failure.
Preparing the Existing Roof Surface
Focus on three prep tasks before the new layer goes down:
- Trim and flatten curled or raised shingle edges
- Remove protruding nails
- Cut back the old ridge cap
The goal is the smoothest possible base for the new layer. According to GAF's own installation guidance, buckled or curling shingles can telegraph through a new layer and prevent proper sealing.
Installing New Flashing Where Accessible
Replace flashing at eaves, valleys, and around penetrations, even during an overlay. Old flashing is a common source of future leaks, and this step is frequently skipped to save time.
Laying and Securing the New Shingle Layer
Align the first course against the existing tab lines. Follow the manufacturer's nailing pattern using fasteners long enough to bite through both layers and reach the deck.
Finishing Ridge, Hip, and Valley Details
Install new ridge cap shingles. Then check something easy to overlook: has the added roof height blocked existing ventilation intakes or exhausts? Balanced airflow (roughly 50% intake, 50% exhaust) matters more than most homeowners realize.
Post-Installation Validation
Walk the roof and look for visual uniformity, with no bumps or waves telegraphing through. Confirm flashing seals are watertight. Schedule a follow-up check after the first heavy rain to catch anything missed.
Common Overlay Problems and How to Fix Them
These are the issues homeowners and contractors run into most often, shortly after an overlay goes on.
Telegraphing and Bumpy Surfaces
Problem: Old shingle edges and gaps visibly show through the new layer.
Likely cause: Existing shingles weren't flattened, or were too curled and uneven before installation.
Fix: Re-flatten and re-secure problem areas, unless the unevenness is too severe to correct—in which case a full tear-off becomes the honest recommendation.
Leaks Appearing Shortly After Installation
Some overlay failures show up as water, not bumps.
Problem: Water intrusion at valleys, penetrations, or eaves.
Likely cause: Inadequate new flashing or leak-barrier installation over the old layer.
Fix: Have a licensed roofer re-flash critical junctions and reseal transitions properly.
Premature Wear and Shortened Lifespan
A third failure point isn't visible right away: shortened shingle life.
Problem: New shingles show granule loss or visible aging well before their rated lifespan.
Likely cause: Trapped heat and reduced attic ventilation from the double layer.
Fix: Improve attic ventilation, and budget for an earlier-than-expected replacement cycle since overheated decks can reach 170°F or more and accelerate material breakdown regardless of shingle quality.
A Smarter Alternative: Extending Roof Life Without Overlay or Full Replacement
Not every roof is a good overlay candidate. Maybe it already has two layers. Maybe the homeowner is wary of hidden damage under a new surface, or doesn't want to risk voiding a warranty. That's where a different approach makes sense.
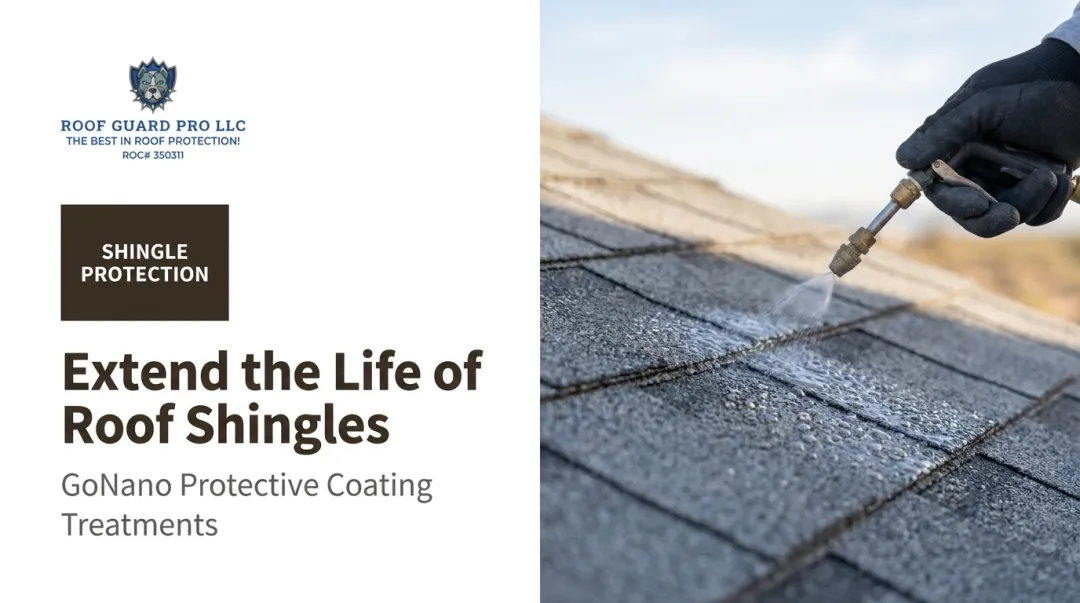
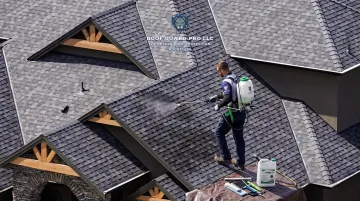
GoNano Shingle Saver works on a different principle entirely. Instead of adding a layer, it treats the shingles you already have.
Here's the mechanism: the product uses nanosilica-modified asphalt particles, far smaller than what you'd find in a typical silicone or acrylic sealant. That small size lets them penetrate deep into the shingle's pores rather than sitting on top.
Once inside, they replace the natural oils shingles lose to age and sun exposure (the same oil loss that drives curling and cracking). The treatment also adds permanent UV protection, which matters a lot in Arizona's sun.
Why this sidesteps overlay problems entirely:
- No added layer means no code layer-count issue to track
- No risk of trapping existing damage under a new surface
- Backed by a 10-year GoNano manufacturer's warranty
- Works on both aging roofs (12–20+ years) and new construction, as long as shingles still have structural integrity, meaning no curling, lifting, or granule loss
These benefits come with real savings. A typical Arizona re-roof runs $10,000 to $40,000+, depending on size and materials. A Shingle Saver application costs a fraction of that, priced per roof after a free inspection, and can add 10 to 15 years of usable roof life without replacement.
Roof Guard Pro, LLC (Arizona ROC# 350311) offers free onsite estimates across the Phoenix East Valley (Mesa, Chandler, Gilbert, Scottsdale, and Tempe) to give an honest read on whether a roof is treatable or genuinely needs replacement. If the shingles have already curled or lost their granular structure, that gets flagged upfront rather than coated over.
Pro Tips for a Successful Overlay — and Final Thoughts
A few things separate a clean overlay from a problem-prone one:
- Time it for moderate weather. Extreme heat softens asphalt and complicates proper alignment and sealing.
- Get the manufacturer's stance in writing. Confirm overlay eligibility with the shingle manufacturer before starting.
- Photograph everything. Document the roof's condition before and during work for warranty and insurance records.
- Hire a licensed contractor. Code compliance, load assessment, and steep-slope or multi-story work aren't places to cut corners.
Installation quality is what actually determines how long an overlay lasts. A rushed job on a marginal roof will fail early no matter how good the shingles are.
That's why the safest first step, whether you're leaning toward overlay, treatment, or replacement, is a professional inspection that weighs all three options honestly. Roof Guard Pro offers free onsite estimates evaluating treatment against overlay for East Valley homeowners.
Frequently Asked Questions
Do old shingles need to be removed before installing new shingles?
Not always. If there's only one existing layer that's flat and structurally sound, overlay is possible. Damaged decking, sagging, or a second existing layer means tear-off is required.
How long do shingles last, and how can I tell if old shingles are still good?
Lifespan varies by material and climate, though industry data shows roofs are typically replaced around 19 years of age. Watch for curling, cracking, missing granules, or bald spots as end-of-life signs.
How many layers of shingles can legally be on a roof?
Most local building codes cap roofs at two total layers, following the model set by the International Residential Code (IRC). Confirm exact limits with your local building department before proceeding.
Does shingling over an old roof void the manufacturer's warranty?
It depends on the tier. Basic warranties often stay intact, but enhanced coverage tiers from major manufacturers frequently require full tear-off. Check with the manufacturer beforehand.
Is shingling over an old roof cheaper than a full roof replacement?
It saves on upfront tear-off and disposal costs, yes. But reduced lifespan and potential hidden damage can make it more expensive over time.
What's the difference between overlaying old shingles and a treatment like GoNano Shingle Saver?
Overlay adds a physical second layer of shingles on top of the old one. Shingle Saver treats and restores the existing shingles in place, adding years of life without extra weight, layer-count concerns, or warranty risk.